Automating workflows with Power Automate is a game-changing way to eliminate manual tasks, boost operational speed, and keep your business running like a well-oiled machine. But even the best workflows can hit a snag—and when they do, you need instant solutions to avoid costly disruptions. Imagine a workflow in your inventory system that automatically updates stock as items are added or removed. If that process fails, you’re left with inaccurate inventory data, potentially delaying orders, creating stockouts, or triggering unnecessary expenses.
Luckily, Power Automate is built with smart error-handling features to keep your workflows on track and your data accurate. With the right setup, you can prevent issues before they impact your operations and keep everything moving seamlessly. Here’s a breakdown of Power Automate’s error-handling tools, along with key screens and settings that make your workflows not just powerful, but foolproof.
Starting Strong: Essential Concepts to Dive In
Power Automate makes it easy to build a flow that works just right for your business. Here’s a quick guide to getting started:
- Start from Blank: This option lets you create a custom flow from the ground up, with all kinds of triggers to fit exactly what you need. You’ve got a few different types to choose from:
- Automated Flow: Starts automatically when an event happens, like receiving an email.
- Instant Flow: Kicks off only when you manually click a button.
- Scheduled Flow: Runs on a set schedule—hourly, daily, whatever works best.
- Desktop Flow: Ideal for automating tasks on your desktop or web applications.
- Business Process Flow: Guides users through each step in a specific sequence—perfect for structured workflows that need to follow certain steps.
- Start from a Template: Power Automate offers a bunch of pre-built templates designed for common tasks. Just pick one, make any tweaks to fit your needs, and you’re ready to go.
- Start from a Connector: Connectors let you bring together different services (like SharePoint, Outlook, and Teams) to automate processes across tools.
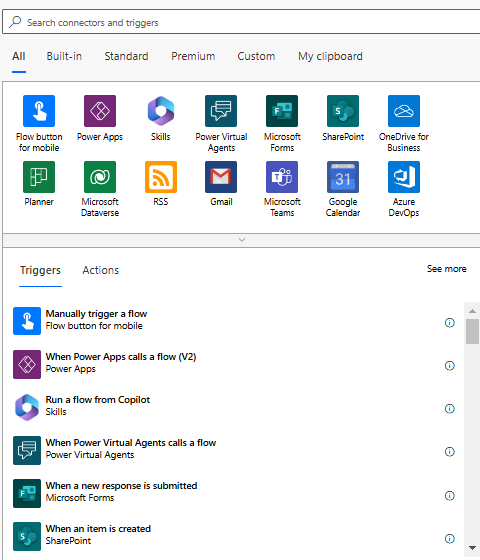
Key Screens and Settings for Handling Errors in Power Automate
After setting up a flow, Power Automate gives you several tools to keep things running smoothly and fix issues before they get big. Here’s a quick look at the main features that help you stay in control:
1) Ellipsis Menu (…): You’ll see a three-dot menu next to each action in your flow, which opens up a bunch of options to make managing your flow easier:
- Copy to My Clipboard (Preview): This lets you quickly duplicate any action. It’s a handy time-saver when you need the same step in more than one place.
- New Comment: Add comments to describe what each action does. It’s especially useful for team projects—anyone else working on the flow will instantly know what’s happening in each step.
- Rename: Change the default names of actions and conditions to something that makes sense at a glance. This little step can make troubleshooting way easier down the line.
- Add a Note: Use notes to give a bit more context, like why an action is there or what it’s supposed to accomplish.

2) Static Result (Preview): This feature is a lifesaver for testing. It lets you simulate the output of an action without running the entire flow. This way, you can troubleshoot specific issues without wasting time on the whole process. Perfect for quickly pinpointing problems!
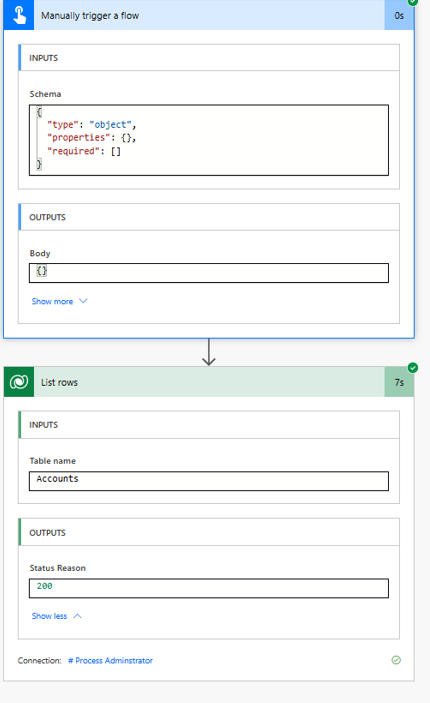
3) Settings (Configure): This is where you get to fine-tune your error handling for maximum efficiency:
- Retry Policy: Automatically retries actions that fail because of temporary glitches, so your flow keeps moving forward without missing a beat.
- Timeout: Set a time limit on each action to prevent a single step from dragging down the whole process.
- Secure Inputs and Outputs: Ensure sensitive data is protected by securing inputs and outputs throughout the flow.
- Tracked Properties: Add extra data points to monitor each action more closely, giving you better insight for troubleshooting and optimization.
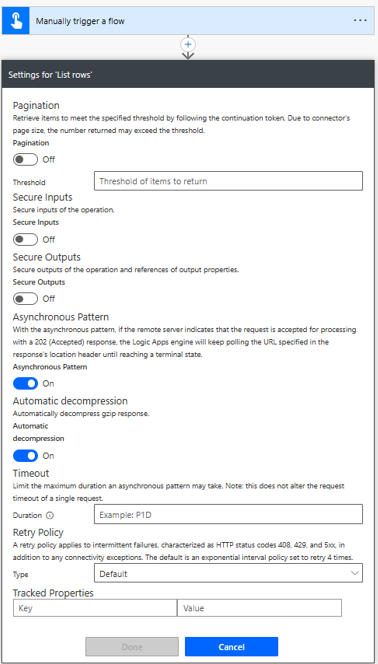
4) Configure Run After: This setting is key to managing errors effectively. It allows you to decide what happens if an action fails—whether to retry, skip to the next step, or stop the flow entirely. For example, you can set it up to automatically notify you or your team when an issue occurs, so you can take action immediately and keep the process moving smoothly.
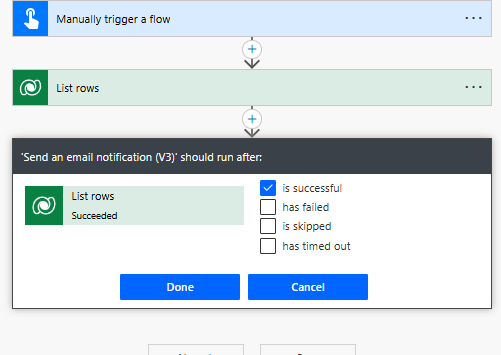
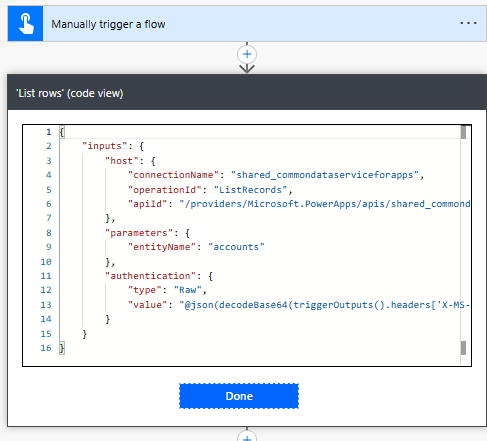
5) Peek Code: This option lets you dive into the backend by viewing the JSON code for each action, including IDs and authentication details. It’s especially useful for advanced users or when you need to troubleshoot more complex flows and understand what’s happening behind the scenes.
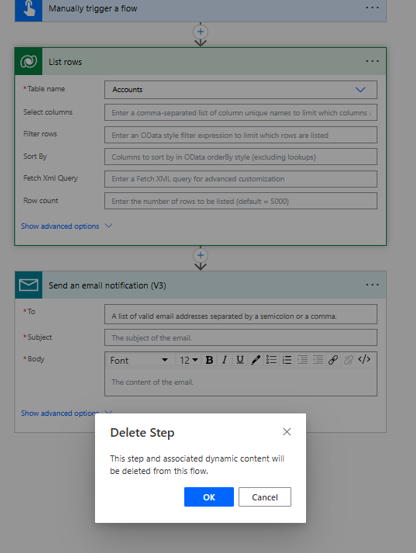
Delete Step Confirmation: When you try to remove an action, Power Automate asks for confirmation first, so you don’t accidentally delete something important. This extra step ensures your workflow stays intact and avoids unintentional disruptions.
Building Unbreakable Workflows with Power Automate
Power Automate’s error-handling tools are more than just safeguards—they’re the key to crafting robust, intuitive workflows that elevate how your business operates. By leveraging these smart, built-in tools, you’re not just preventing issues; you’re building a seamless, reliable system that automatically adapts to challenges, keeping your essential processes moving forward.
With Power Automate’s flexible yet powerful settings, your workflows become smarter, ensuring disruptions are handled swiftly, and your team stays focused and informed. The result? An effortless, streamlined approach to task automation that lets your business thrive without interruption—supporting continuity and unlocking new levels of operational success. Learn more about how our tailored solutions can drive your business forward here.


